
When it comes to setting up your Voyager digital backup camera, finding the pairing button is the crucial first step. The pairing button allows you to establish a secure connection between the camera and your display device, ensuring seamless transmission of the video feed. While the location of the pairing button may vary slightly depending on the model, this article aims to provide a general guide to help you locate it easily.
Typically, the pairing button on Voyager digital backup cameras is located on the camera itself. It is usually a small button that is either recessed or protruding slightly from the camera’s surface. The button may be labeled “Pair” or have a recognizable icon indicating its function. It is often positioned near the power button or on the side of the camera, but it may also be found on the back or bottom of the device.
Locating the pairing button can be a matter of carefully examining the camera’s exterior. Look for any buttons that seem out of place or different from the other controls. If the camera is mounted, you may need to remove it from its bracket or housing to access the pairing button. Keep in mind that some camera models may have additional features or buttons nearby, so it’s essential to read the user manual or consult the manufacturer’s website for specific instructions.
Once you have found the pairing button, press and hold it for a few seconds until you see a visual confirmation on the camera display or hear an audible cue. This action will initiate the pairing process, allowing the camera to search for and connect to your display device. Make sure that your display device is also in pairing mode, following the instructions provided with it. Once the connection is established, you should see the live video feed from the backup camera on your display, providing enhanced visibility and safety while reversing.
Overview of Voyager Digital Backup Camera
The Voyager Digital Backup Camera is a versatile and reliable device that provides a clear view of the rear surroundings of a vehicle, making it easier and safer to navigate in reverse. With its advanced features and user-friendly design, the Voyager Digital Backup Camera is a top choice for those seeking a dependable backup camera system.

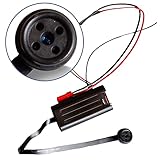
This camera system consists of a high-resolution camera that captures a wide-angle view of the rear area, ensuring that blind spots are minimized. The camera is equipped with infrared LEDs, allowing for clear visibility even in low-light conditions and at night. The camera’s waterproof housing ensures that it can withstand exposure to the elements, making it suitable for use in various weather conditions.
The Voyager Digital Backup Camera features a wireless connection, which eliminates the need for complicated wiring and makes the installation process quick and hassle-free. The camera pairs easily with a compatible display or monitor, providing an instant live feed of the rear view. The pairing process is simple and can be done with the push of a button.
The camera’s display capabilities can be further enhanced with the use of optional accessories, such as a wireless receiver or a multi-camera control unit. These accessories allow for the addition of multiple cameras, enabling a comprehensive view of the vehicle’s surroundings. The camera system is compatible with various display options, including standalone monitors, integrated monitors, and rearview mirror replacements.
When it comes to safety and convenience, the Voyager Digital Backup Camera is a reliable choice. Its durable construction, wireless functionality, and easy installation make it an ideal solution for any vehicle. Whether you’re towing a trailer, maneuvering in tight spaces, or simply want an extra set of eyes on the road, the Voyager Digital Backup Camera has you covered.
| Key Features |
|---|
| • High-resolution camera with wide-angle view |
| • Infrared LEDs for clear visibility in low-light conditions |
| • Waterproof housing for all-weather use |
| • Wireless connection for easy installation |
| • Simple pairing process with push-button functionality |
| • Compatible with optional accessories for enhanced display capabilities |
Importance of the Pairing Button
The pairing button is an essential component of the Voyager Digital Backup Camera system. It plays a crucial role in setting up and connecting the camera to a compatible display device such as a monitor or a smartphone. Understanding the importance of the pairing button is essential for a seamless and efficient backup camera experience.
Wireless Connection
The pairing button is primarily used to establish a wireless connection between the backup camera and the display device. By pressing this button, the camera enters a pairing mode, allowing it to search for and connect to the display device wirelessly. This wireless connection eliminates the need for any physical cables, making the installation process much simpler and more convenient.
Secure and Stable Connection
Once the camera and the display device are successfully paired, the pairing button helps ensure a secure and stable wireless connection. This button allows the devices to establish a unique and encrypted connection, protecting the camera’s feed from being intercepted or accessed by unauthorized parties. A secure connection is vital for maintaining the privacy and integrity of the backup camera system.
The pairing button also helps maintain a stable connection between the camera and the display device, minimizing signal interference and ensuring a consistent video feed. This stability is crucial for a reliable backup camera system, as it allows the driver to have a clear view of the surroundings and make safe and accurate maneuverings.
Easy Installation and Setup
The pairing button simplifies the installation and setup process of the Voyager Digital Backup Camera. By following the manufacturer’s instructions, users can easily locate the pairing button on the camera or its transmitter unit. Pressing and holding the button for a specified period initiates the pairing process, making it user-friendly and accessible even for non-technical individuals.
Additionally, the pairing button often features LED indicators that provide visual feedback regarding the pairing status. These indicators help users understand if the camera is in pairing mode, if it has successfully connected to the display device, or if there are any connection issues that need to be addressed.

In conclusion, the pairing button is a crucial component of the Voyager Digital Backup Camera system. It facilitates the wireless connection, ensures a secure and stable connection, and simplifies the installation and setup process. By understanding the importance of the pairing button, users can maximize the functionality and performance of their backup camera system, enhancing safety and convenience while reversing or parking.
Benefits of Having a Pairing Button
A pairing button on a Voyager digital backup camera offers several benefits. Here are some of the advantages:
-
Convenient Setup: The pairing button makes the setup process quick and easy. By pressing the button, you can initiate the pairing mode without the need for complex configurations or technical expertise.
-
Efficient Connection: With a pairing button, you can establish a secure and stable connection between your backup camera and the display unit. This ensures that you receive high-quality, real-time video feeds without interruptions.
-
Reduced Interference: Pairing buttons often utilize secure frequency bands or encryption protocols to minimize interference from other wireless devices. This helps to maintain a clear and reliable connection, even in crowded environments with multiple electronic devices.
-
Compatibility: A pairing button ensures compatibility between the backup camera and the display unit. This eliminates the hassle of searching for compatible devices or dealing with compatibility issues, allowing you to start using the backup camera right away.
-
Seamless Integration: By pressing the pairing button, the backup camera and the display unit can easily identify each other and establish a connection. This seamless integration enables swift communication and smooth operation, enhancing the overall user experience.
-
Flexibility: With a pairing button, you can easily switch between multiple backup cameras and display units, depending on your needs. This gives you the flexibility to use different setups for different vehicles or situations without any complications.
Overall, having a pairing button on a Voyager digital backup camera simplifies the setup process, ensures a reliable connection, and enhances convenience and flexibility for users.
Locating the Pairing Button on Voyager Digital Backup Camera
The pairing button on the Voyager Digital Backup Camera is an essential component that allows you to establish a secure connection between the camera and your device. This button is used during the initial setup process and whenever you need to pair the camera with a new device.
Step 1: Locate the Camera
The first step is to locate the Voyager Digital Backup Camera. The camera is typically mounted on the rear of your vehicle, providing a clear view of the surrounding area. It is important to ensure that the camera is powered on and functioning properly before attempting to locate the pairing button.

Step 2: Find the Pairing Button
Once you have located the camera, you will need to locate the pairing button. The pairing button is typically located on the camera housing or the camera’s power cable. It is a small button that is often recessed to prevent accidental activation. You may need to refer to the camera’s user manual or manufacturer’s instructions for specific guidance on locating the pairing button.
Some cameras may have the pairing button clearly labeled, while others may require you to search for a small button or recessed area that corresponds to the pairing function. Take your time to carefully inspect the camera, ensuring that you have identified the correct button before proceeding.
It is worth noting that the location of the pairing button can vary between different models and brands of Voyager Digital Backup Cameras. Therefore, if you are unable to locate the pairing button using the above steps, it is advisable to consult the camera’s user manual or contact the manufacturer for further assistance.
By following these steps and locating the pairing button on your Voyager Digital Backup Camera, you will be able to successfully pair the camera with your device and enjoy the benefits of a reliable backup camera system.
Troubleshooting Pairing Button Issues
If you are having trouble locating the pairing button on your Voyager digital backup camera, there are a few troubleshooting steps you can follow to resolve the issue.

1. Check the user manual: The first step is to consult the user manual that came with your Voyager digital backup camera. The manual should have detailed instructions on where the pairing button is located and how to use it.
2. Examine the camera unit: Carefully inspect the camera unit for any buttons or switches. The pairing button is typically located on the camera unit itself, often labelled with a small icon or the word “pair”. Look for any buttons that are easily accessible or protruding from the camera unit.
3. Look for a remote control: Some Voyager digital backup cameras come with a remote control that can be used for pairing and other functions. If you have a remote control, check for any buttons specifically labeled for pairing. These buttons may be located on the remote control itself or on the camera unit.
4. Contact customer support: If you have tried the previous steps and still cannot locate the pairing button, it may be a good idea to contact the customer support for your Voyager digital backup camera. They will be able to provide you with specific instructions for your model and help troubleshoot any issues you may be experiencing.
Remember to always refer to the user manual and follow the manufacturer’s instructions when attempting to pair your Voyager digital backup camera. This will ensure that you are using the correct process and avoid any potential damage to your camera or other devices.

Question-answer:
Where can I find the pairing button on the Voyager Digital backup camera?
The pairing button on the Voyager Digital backup camera is usually located on the camera unit itself. It may be labeled as “pair” or have a Bluetooth symbol. Please refer to the user manual for specific instructions.
How do I pair my Voyager Digital backup camera with my device?
To pair your Voyager Digital backup camera with your device, first locate the pairing button on the camera unit. Press and hold the pairing button until the LED indicator starts flashing. Then, on your device, go to the Bluetooth settings and select the camera name from the list of available devices. Follow the on-screen prompts to complete the pairing process.
What should I do if I can’t find the pairing button on my Voyager Digital backup camera?
If you can’t find the pairing button on your Voyager Digital backup camera, you may need to refer to the user manual for specific instructions. Alternatively, you can try checking the camera unit for any buttons with symbols or labels related to pairing or Bluetooth. If you still can’t find it, contacting the manufacturer for assistance would be a good option.
Is the pairing button on the Voyager Digital backup camera easy to locate?
Locating the pairing button on the Voyager Digital backup camera can vary depending on the model. Some models may have the pairing button clearly labeled and easily visible, while others may have it hidden or integrated with other buttons. It is recommended to refer to the user manual or contact the manufacturer for specific instructions on locating the pairing button for your particular model.
Can I pair my Voyager Digital backup camera with multiple devices simultaneously?
The ability to pair a Voyager Digital backup camera with multiple devices simultaneously can vary depending on the model and specifications. Some models may support multiple simultaneous pairings, while others may only allow one device to be paired at a time. It is recommended to refer to the user manual or contact the manufacturer to determine the exact capabilities of your specific camera model.


