
Digital technology has revolutionized photography, allowing us to capture and share moments with ease. But what about the vast archives of camera negatives, stored in basements and attics, waiting to be rediscovered? Who has the skill and expertise to convert these physical negatives into digital files?
The process of digitizing film negatives requires technical knowledge and specialized equipment. It is a delicate task that requires precision and attention to detail. Thankfully, there are professionals who have dedicated their careers to this art form.
Professional digitization services offer a range of options for individuals and organizations looking to convert their camera negatives into digital files. These services use high-resolution scanners and cutting-edge software to ensure that every detail of the original negative is captured accurately.
Archives, museums, and photographers often turn to these digitization services to preserve their valuable collections. The digital files can be easily stored, edited, and shared, ensuring that these important images are not lost to time.
So, who digitizes camera negatives? The answer lies with the experts who are passionate about preserving our visual history. They have the knowledge, skills, and equipment to transform physical negatives into digital files, allowing us to explore and appreciate the past in a modern digital age.

The Process of Digitizing Camera Negatives
Digitizing camera negatives involves converting traditional film negatives into digital files for easier storage, editing, and printing. This process typically requires specialized equipment and software to ensure the best possible results. Here is a step-by-step breakdown of how camera negatives are digitized:
- Cleaning and preparation: Before beginning the digitization process, the camera negatives need to be cleaned to remove any dust, dirt, or fingerprints that may affect the quality of the digital files. This can be done using compressed air or a film cleaning solution and a soft brush or cloth.
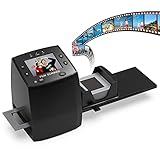
- Scanning: Once the camera negatives are clean, they can be scanned using a film scanner. Film scanners are designed specifically for this purpose and can capture the details and colors of the negative with high resolution. The scanner converts the negative into a digital image file.
- Adjustments: After scanning, the digital image file may need adjustments to ensure accurate colors and exposure. This is typically done using photo editing software, where professionals can adjust settings such as brightness, contrast, saturation, and color balance.
- File format conversion: Depending on the intended use of the digitized camera negatives, the image file may need to be converted into a different file format. Common file formats for camera negatives include JPEG, TIFF, and RAW.
- Metadata tagging: To ensure proper organization and easy retrieval, it is important to add relevant metadata to the digital files. This may include information such as the date, location, and subject of the photographs.
- Backup and storage: Once the digitization process is complete, it is crucial to create a backup of the digital files to prevent any loss of data. The files can be stored on external hard drives, cloud storage services, or other secure storage options.
Digitizing camera negatives allows photographers and individuals to preserve their film-based photographs digitally and enables easier access and manipulation of the images for various purposes. Proper digitization techniques and equipment are essential to ensure the best quality and longevity of the digital files.
What is Digitalization?
Digitalization is the process of converting analog information into digital form. It involves capturing, storing, and reproducing data in a digital format. This process has had a significant impact on various industries, including photography.
When it comes to camera negatives, digitalization refers to the process of converting film negatives into digital files. Traditionally, photographs were captured on film, which required chemical processing to develop the images. However, with the advent of digital cameras and advancements in technology, many photographers and archivists have chosen to convert their film negatives into digital format.
The digitalization process typically involves scanning the film negatives using a specialized scanner that captures the image and converts it into a digital file. This digital file can then be stored on a computer or other digital storage medium, such as an external hard drive or cloud storage.

One of the main advantages of digitalization is that it allows for easier access and manipulation of the images. Once the film negatives are converted into digital files, they can be easily viewed, edited, and shared using photo editing software and various online platforms.
Overall, digitalization has revolutionized the way camera negatives are handled, providing photographers and archivists with improved accessibility, flexibility, and preservation of their images.
The Importance of Digitizing Camera Negatives
Digitizing camera negatives is an essential step in preserving and archiving precious memories captured on film. In the digital age, where everything is about convenience and accessibility, it is crucial to convert these negatives into a digital format that can be easily viewed and shared.
Preservation is one of the main reasons why digitizing camera negatives is important. Film deteriorates over time, and it is vulnerable to physical damage, such as scratches, fading, and discoloration. By converting negatives into digital files, you can protect them from further degradation and ensure their longevity.
Digitizing camera negatives also allows for easier access and sharing of images. With digital files, you can easily view and organize your photos on various devices, such as computers, smartphones, and tablets. You can quickly search for specific images, create backups, and conveniently share them with friends and family through social media or email.
Another benefit of digitizing camera negatives is the ability to enhance and restore old photos. Digital editing software allows you to correct any imperfections, adjust colors and exposure levels, and bring out the hidden details in the images. This can significantly improve the quality of the photos and ensure that they remain vibrant and captivating for future generations.
Furthermore, digitization opens up opportunities for creative exploration. Once negatives are in a digital format, you can experiment with different editing techniques, apply filters, and create stunning compositions. The digital realm offers endless possibilities to unleash your creativity and transform your photos into unique works of art.
In conclusion, digitizing camera negatives is a vital process for preserving memories, ensuring their accessibility, and unleashing creative potential. By converting physical film into digital files, you can protect and enhance your images, as well as easily share them with others. Embrace the benefits of digitization and take full advantage of the opportunities it presents in the digital age.
Professional Negative Scanning Services
In today’s digital age, preserving and sharing memories captured on camera negatives has become increasingly important. Whether you have a collection of vintage negatives or personal photographs, professional negative scanning services can ensure that these valuable memories are not lost or forgotten.
One of the key advantages of using professional negative scanning services is the expertise and equipment they possess. These services employ skilled technicians who have years of experience in handling and scanning negatives. They use high-quality scanners and advanced software to ensure that every detail of the original image is captured accurately.

Another benefit of professional negative scanning services is the range of options they offer. Whether you prefer digital files, prints, or both, these services can cater to your specific needs. Digital files are perfect for archiving and sharing online, while prints can be framed and displayed in your home or gifted to loved ones.
Professional negative scanning services also provide additional services such as color correction and image enhancement. Negatives can fade or degrade over time, but these services can restore the original colors and improve the overall quality of the scanned images. This ensures that your memories look as vibrant and vivid as the day they were captured.
One of the concerns many people have when considering professional negative scanning services is the potential damage to their precious negatives. However, reputable scanning services take every precaution to handle and treat the negatives with the utmost care. They use anti-static gloves and gentle cleaning techniques to minimize any risk of damage.
When choosing a professional negative scanning service, it’s important to do thorough research and read reviews from previous customers. Look for a service that offers high-resolution scanning, secure handling of your negatives, and reasonable prices. Remember, these negatives hold irreplaceable memories, so it’s worth investing in a reliable and trustworthy service.
In conclusion, professional negative scanning services provide a valuable solution for preserving and sharing your camera negatives. With their expertise, advanced equipment, and range of options, they ensure that your memories are not lost to time. So, don’t let your negatives gather dust in a drawer – consider digitizing them with a professional scanning service and relive those precious moments again and again.

How Negative Scanning Services Work
When it comes to digitizing camera negatives, there are professional negative scanning services that specialize in this process. These services typically employ specialized equipment and skilled technicians to ensure high-quality results.
Initial Assessment
The process begins with an initial assessment of the camera negatives. The negatives are examined for any damage or deterioration that may affect the scanning process. This assessment helps determine the best approach for scanning and any necessary preparation work.
Preparation and Handling
Once the initial assessment is complete, the negatives are prepared for scanning. This may involve cleaning the negatives to remove any dust or dirt that could interfere with the scanning process. The negatives are also handled with care to avoid any further damage or scratches.
Depending on the condition and format of the negatives, they may need to be carefully flattened or repaired before scanning. This ensures that the negatives are in the best possible condition for digitization.
Scanning Process
Once the preparation work is done, the camera negatives are ready for scanning. Specialized negative scanners are used to capture high-resolution digital images of each negative. These scanners are designed to accurately reproduce the colors, tones, and details of the original negatives.
During the scanning process, each negative is carefully positioned and scanned one by one. The scanners can handle different sizes and formats of negatives, ensuring versatility and compatibility with various types of camera negatives.
After the scanning is complete, the resulting digital images are typically stored on a computer or other storage devices. They can then be further processed, edited, or printed as desired.
Quality Control
Throughout the negative scanning process, quality control measures are in place to ensure the accuracy and quality of the digitized images. Skilled technicians carefully review the scanned images to identify and correct any issues such as dust spots, color inaccuracies, or other imperfections.
| Benefits of Negative Scanning Services |
|---|
| Efficiency: Professional negative scanning services can handle large quantities of negatives efficiently, saving you time and effort. |
| Expertise: Skilled technicians have the knowledge and experience to handle delicate negatives and achieve the best possible results. |
| Preservation: By digitizing camera negatives, you can preserve your precious memories and protect them from further deterioration. |
| Enhancement: Once digitized, the images can be edited, enhanced, and shared easily, allowing you to bring new life to your old negatives. |
Overall, negative scanning services offer a convenient and professional solution for digitizing camera negatives. Whether you have a few negatives or a large collection, these services can help you preserve and enjoy your memories for years to come.
Choosing the Right Negative Scanning Service Provider
When it comes to digitizing your camera negatives, choosing the right service provider is crucial. With so many options available, it can be difficult to determine which one will best meet your needs. Here are some factors to consider when selecting a negative scanning service provider.
Experience and Expertise
One of the most important factors to consider is the experience and expertise of the service provider. Look for a company that has been in the industry for a significant amount of time and has a proven track record of delivering high-quality results. It’s also important to ensure that the provider has a deep understanding of film formats, as different negative types may require different scanning techniques.
Quality of Scans
Another essential consideration is the quality of scans provided by the service provider. Look for a company that uses professional-grade equipment and employs skilled technicians who understand the intricacies of scanning negatives. It’s also important to inquire about the resolution at which the scans will be provided, as this can greatly affect the final output.
Security and Privacy
When choosing a negative scanning service provider, it’s important to consider the security and privacy of your images. Ensure that the company has appropriate security measures in place to protect your negatives during the scanning and digitization process. Additionally, inquire about their privacy policies to ensure that your images will be handled with confidentiality.
Turnaround Time
The turnaround time offered by the service provider is another important factor to consider. Depending on the volume of negatives you have and your urgency to have them digitized, you may need a provider that can deliver quick results. Make sure to inquire about their estimated turnaround time and if they offer rush services, if needed.
Customer Reviews and Testimonials
Reading customer reviews and testimonials can provide valuable insight into the service provider’s reputation and the level of satisfaction they offer to their clients. Look for providers with positive reviews and testimonials that highlight the quality of their scans, attention to detail, and overall customer service.
In conclusion, choosing the right negative scanning service provider requires careful consideration of their experience, the quality of their scans, security and privacy measures, turnaround time, and customer feedback. By taking the time to research and evaluate these factors, you can ensure that your camera negatives are digitized with the utmost care and precision.
DIY Negative Scanning Techniques
While there are many companies and services that specialize in digitalizing camera negatives, some photographers prefer to take matters into their own hands. DIY negative scanning techniques provide creative control and cost-saving benefits for photographers who want to digitize their film negatives at home. Here are some popular DIY methods:
Using a Digital Camera
One of the simplest and most accessible methods is using a digital camera to capture the negative. To do this, you will need a light table or a backlit surface to place your negatives on. Simply set up your camera on a tripod, position it directly above the negative, and adjust the focus and exposure settings. Take a picture of the negative using a macro lens or a lens with a close-up capability. This method allows you to capture the full resolution of your camera, resulting in high-quality digital scans.
Using a Flatbed Scanner
If you already own a flatbed scanner, you can utilize it to scan your negatives. Start by cleaning the scanner glass to ensure optimal scan quality. Next, place the negative on the glass, emulsion side down, and close the scanner lid. Open your scanning software and select the appropriate settings for negative scanning. These settings may include choosing the film type, color correction options, and resolution. Start the scan and wait for the digitized negative to appear on your computer. This method may require some experimentation to achieve desired results, but it is a cost-effective option for many photographers.
Using a Film Holder and Macro Lens
For those looking for a more advanced DIY method, using a film holder and a macro lens can provide excellent results. Film holders are designed to hold your negatives securely and flatly. Start by mounting the film holder onto a light table or a backlit surface. Place your negative into the film holder and adjust its position. Attach a macro lens to your camera and position it directly above the negative. Adjust the focus, aperture, and exposure settings as necessary. Capture an image of the negative and repeat the process for each frame. This technique provides precise control over the digitization process and is particularly suitable for photographers working with medium format or large format negatives.
When it comes to DIY negative scanning, experimentation and practice are key. Each method may have its advantages and limitations, so it is important to find the technique that works best for your specific needs. With the right equipment and a little patience, you can achieve high-quality digital scans of your camera negatives right from the comfort of your own home!
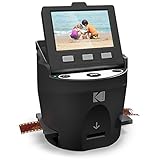
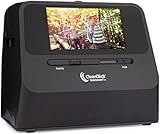
Using a Film Scanner at Home
Scanning your camera negatives at home can be a great way to preserve and digitize your cherished memories. With the right equipment and a little bit of patience, you can easily convert your film negatives into high-quality digital images without the need for a professional lab.
Choosing the Right Scanner
When selecting a film scanner, there are a few key factors to consider. Look for a scanner that is specifically designed for scanning negatives and slides, as these often offer higher resolutions and better color accuracy compared to regular flatbed scanners. Additionally, ensure that the scanner you choose is compatible with your computer operating system and has the necessary software for scanning and editing your images.
Preparing Your Negatives
Before scanning your negatives, it’s important to clean them properly to remove any dust or debris that may affect the quality of your final digital images. Use a microfiber cloth or a can of compressed air to gently remove any loose particles from the negatives. If you notice any fingerprints or smudges, you can use a film cleaning solution and a lint-free cloth to carefully clean the surface.
It’s also a good idea to organize your negatives and create an index to easily locate specific photos. You can use archival sleeves or negative holders to keep your negatives safe and organized.
Scanning Process
Begin by installing the scanner software on your computer and following the provided instructions. Start the software and select the appropriate scanning settings for your negatives, such as resolution, color profile, and file format.
When placing your negatives in the scanner, ensure that they are properly aligned and flat to avoid any distortion. Depending on the type of scanner you have, you may need to insert one or multiple negatives into a dedicated tray or holder.
Once your scanner is set up and your negatives are in place, initiate the scan using the designated button or command in the software. Depending on the resolution and number of negatives you are scanning, the process may take some time.
Editing and Saving Your Scanned Images
After scanning, your images may require some editing to enhance the colors, adjust the exposure, or remove any imperfections. You can use image editing software such as Adobe Photoshop or Lightroom to perform these adjustments.
When you are satisfied with the edits, save your scanned images in a high-quality file format, such as TIFF or RAW, to preserve as much detail as possible. You may also consider creating backups of your digital images on external hard drives or cloud storage for added security.
By using a film scanner at home, you can easily preserve and digitize your camera negatives, making it convenient to share and enjoy your memories in the digital age.
Converting Negatives with a Digital Camera and Lightbox
Converting negatives into digital images is a popular way to preserve old photographs and make them easily accessible in the digital age. While there are many scanning services available, converting negatives with a digital camera and lightbox is a cost-effective and convenient option that can be done at home.
What You Will Need
Before you begin, make sure you have the following:
- A digital camera with adjustable settings
- A lightbox or a light source with even illumination
- Negatives or slides to be converted
- A tripod (optional but recommended for stability)
The Process
Here are the steps to convert negatives with a digital camera and lightbox:
- Set up your lightbox and turn on the light source.
- Insert the negatives or slides into the appropriate slots on the lightbox.
- Position your digital camera on a tripod or steady surface. Adjust the camera settings for optimal image capture, including ISO, aperture, and shutter speed.
- Place the camera lens directly above the negatives or slides, ensuring that it is parallel and centered.
- Use the camera’s viewfinder or live view feature to compose and focus the image.
- Capture the image by pressing the shutter button. For best results, use a remote shutter release or the camera’s self-timer to minimize camera shake.
- Repeat the process for each negative or slide, making sure to adjust the camera settings if necessary.
After capturing the images, you can transfer the digital files to your computer for further editing and archiving. Use photo editing software to adjust the exposure, colors, and sharpness of the converted images if needed.
This method allows you to convert negatives with a digital camera and lightbox in a relatively short amount of time. It offers flexibility in terms of camera settings and allows you to control the quality of the final digital images. However, it is important to note that the final result will depend on the quality of the camera, lens, and lighting setup. Experimentation and practice can help you achieve the best possible results.
The Role of Photography Labs in Digitalizing Negatives
In the digital age, where everything is being stored digitally, photography labs play a crucial role in preserving and reviving old memories captured on camera negatives. These labs specialize in the process of converting analog film negatives into digital formats, ensuring that precious images are not lost to time.
Photography labs employ skilled technicians who are experienced in handling delicate negatives. They use advanced scanning equipment and software to convert the physical film into a high-resolution digital file. This process involves carefully placing the negatives in a scanner, adjusting settings for optimal image quality, and scanning each frame.
Once the negatives are scanned, the lab technicians can then use post-processing software to enhance the images, remove imperfections, adjust colors, and restore details that may have been lost over time. This ensures that the digital copies are of the highest quality possible, surpassing the limitations of the original film negatives.
By digitizing negatives, photography labs ensure that these precious moments can be accessed and enjoyed for years to come. Digital copies of the images can be easily stored and shared on various platforms, allowing users to preserve their memories in a more convenient and accessible manner.
Furthermore, the process of digitalization also enables photographers and artists to manipulate and edit the images with ease. With digital copies of the negatives, they can experiment with different techniques, apply filters, and create unique versions of the original photographs.
In conclusion, photography labs serve as a bridge between the analog and digital worlds, preserving memories captured on camera negatives and making them accessible in the digital era. With their expertise and advanced technology, they play an essential role in ensuring that these precious moments are not lost to time but instead can be treasured and shared for generations to come.
Traditional Photography Labs
Traditional photography labs have been the go-to place for film development and printing for many years. These labs offer a comprehensive range of services for photographers who prefer the traditional film format.
The Process
When photographers shoot on film, they bring their exposed rolls to traditional photography labs for processing. The labs then develop the film using chemicals and other specialized equipment. This process includes developing the film negatives, which are the base for creating prints.
After the negatives are developed, the labs can print them onto photographic paper using traditional techniques. The photographers can select the desired prints based on their preferences and requirements.
Benefits
Traditional photography labs provide several benefits for photographers. Firstly, photographers who shoot on film appreciate the expertise and knowledge of the lab technicians. These professionals have years of experience in working with film and can ensure high-quality results.
Additionally, traditional labs offer a variety of printing options. Photographers can choose from different paper types, finishes, and sizes, allowing them to customize their prints to match their artistic vision. The labs also use archival-quality materials and techniques, ensuring the longevity of the prints.
Another advantage of traditional photography labs is the ability to discuss the photographs with the lab technicians. These professionals can provide valuable input and suggestions based on their expertise, helping photographers improve their work.
In conclusion, traditional photography labs play a vital role in the digitalization of camera negatives. They offer a range of services, including film development and printing, and provide expertise and customization options for photographers who prefer the traditional film format.
Specialized Labs for Film Preservation
Preserving the rich history of film is a crucial task, and specialized labs play a vital role in this process. These labs are equipped with advanced technology and expertise required for the digitalization and preservation of camera negatives.
Advantages of Specialized Labs
Specialized labs offer several advantages when it comes to film preservation:
- Expertise: These labs have a team of professionals who are highly skilled in handling and processing camera negatives. They have a deep understanding of film preservation techniques and are trained to ensure the best results.
- State-of-the-art equipment: Specialized labs are equipped with high-quality scanners, film cleaning machines, and other advanced equipment specifically designed for digitizing camera negatives. This ensures accurate and detailed digitalization of the film.
- Quality control: Specialized labs have strict quality control measures in place to ensure the integrity and longevity of the digitized negatives. This includes performing regular inspections, using calibrated equipment, and following standardized procedures.
- Preservation standards: These labs adhere to international preservation standards, ensuring that the digitized negatives are preserved in the best possible way. They follow established guidelines for digitization, storage, and long-term preservation of film materials.
The Process
The process followed by specialized labs for film preservation typically involves the following steps:
| Step | Description |
|---|---|
| Inspection | The camera negatives are carefully examined for any physical damage, such as scratches or tears. This helps in determining the appropriate handling and restoration techniques. |
| Cleaning | The negatives are cleaned using specialized machines to remove any dirt, dust, or debris. This step is essential to ensure accurate and high-quality digitalization. |
| Scanning | The cleaned negatives are scanned using high-resolution film scanners. The scanning process captures the details and colors of the original film, creating a digital copy of the negatives. |
| Color correction | If required, the digital copy undergoes color correction to restore the original colors and enhance the overall quality of the film. |
| Metadata addition | Metadata, such as film title, director, and year of production, is added to the digital copy for easy identification and cataloging purposes. |
| Storage and preservation | The digitized camera negatives are stored using archival-grade materials and follow proper preservation techniques to ensure their longevity. |
Overall, specialized labs for film preservation play a critical role in safeguarding the legacy of cinema by digitizing and preserving camera negatives using advanced technology and expertise.
Question-answer:
Who is responsible for digitizing camera negatives?
The responsibility for digitizing camera negatives usually falls on professional scanning services or photo labs specializing in film scanning.
What is the process of digitizing camera negatives?
The process of digitizing camera negatives involves using a high-resolution film scanner to convert the physical negatives into digital files. This scanner captures each frame of the negative and creates a digital image of it.
Can I digitize camera negatives myself?
Yes, it is possible to digitize camera negatives yourself if you have the necessary equipment. However, it requires a film scanner and some technical knowledge to achieve high-quality results.
How much does it cost to digitize camera negatives?
The cost of digitizing camera negatives can vary depending on factors such as the number of negatives, the resolution required, and the service provider. On average, you can expect to pay around £0.25 – £1 per negative.
Are there any risks involved in digitizing camera negatives?
There are some risks involved in digitizing camera negatives, especially if you choose to do it yourself. Mishandling the negatives or using improper scanning techniques can result in image quality degradation or even permanent damage to the negatives.


