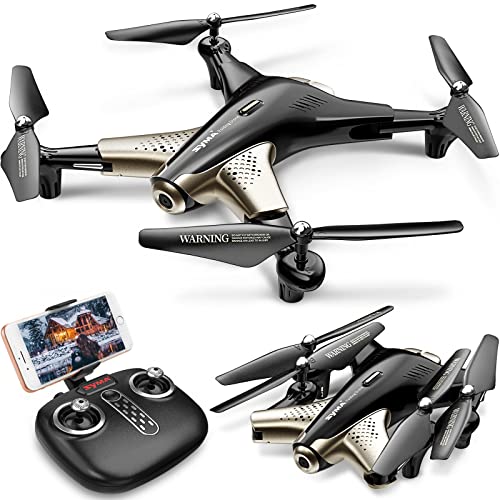
So you’ve just bought a brand new drone and you’re excited to start flying it. You’ve carefully read through the instructions, charged up the batteries, and made sure all the components are properly connected. But when you try to take off, nothing happens. You’re left scratching your head, wondering why won’t my drone take off?
There are several reasons why your drone may not be taking off, and it’s important to troubleshoot the issue to ensure a safe and successful flight. One possible reason could be that the motors are not spinning correctly. Check to see if they are properly calibrated and functioning. You may also want to inspect the propellers to make sure they are securely attached and not damaged.
Another reason could be that the drone is not getting a strong enough GPS signal. Drones rely on GPS to navigate accurately, so if the signal is weak or non-existent, it can prevent the drone from taking off. Try moving to an open area away from tall buildings or other sources of interference to see if that resolves the issue.
Additionally, it’s crucial to check the battery level of your drone. If the battery is low, it may not have enough power to take off. Make sure the battery is fully charged and in good condition. If you have a spare battery, try swapping them out to see if that makes a difference.
In conclusion, there can be several reasons why your drone won’t take off. It could be due to motor or propeller issues, a weak GPS signal, or a low battery. By troubleshooting these potential problems, you can get your drone up in the air and start enjoying the thrill of flying.

Common reasons why a drone won’t take off
Despite their advanced technology, drones can sometimes refuse to take off due to various reasons. Here are some common issues that might prevent your drone from taking off:
Battery issues
One of the most common reasons why a drone won’t take off is a low or malfunctioning battery. Ensure that your drone’s battery is fully charged and properly connected. Also, check for any damaged or bloated batteries, as these can pose safety hazards and affect the drone’s performance.
Calibration problems
Another culprit for a drone’s refusal to take off can be calibration issues. It’s important to calibrate your drone before each flight, especially if you have recently changed its location or made modifications. Follow the manufacturer’s instructions to ensure proper calibration.
Motor issues
A malfunctioning motor can also result in a drone’s inability to take off. Check each motor to ensure they are running smoothly and without any strange noises. If you suspect a faulty motor, it may need to be replaced or repaired.
Propeller problems
Improperly attached or damaged propellers can also prevent a drone from taking off. Ensure that all propellers are securely fastened and in good condition. Replace any worn-out or damaged propellers to maintain optimal performance.
Flight mode or settings
Double-check that your drone’s flight mode and settings are properly configured for takeoff. Make sure you have selected the correct flight mode and that all settings are appropriate for your intended flight conditions.
Obstacle detection and avoidance
Many modern drones are equipped with obstacle detection and avoidance systems. If your drone is not taking off, it could be due to a malfunction or interference with these systems. Check if there are any obstacles nearby or try disabling and re-enabling the obstacle detection feature.

By considering these common reasons and troubleshooting steps, you should be able to determine why your drone is not taking off and take appropriate action to resolve the issue.
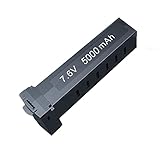
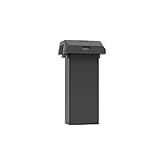
Drone battery is low
If your drone won’t take off, one possible reason could be that the battery is low. Drones require a sufficient amount of power to take off and stay airborne. If the battery is running low, it may not have enough energy to operate the motors and lift the drone off the ground.
To check if the battery is low, make sure to inspect the battery indicator on your drone’s controller or app. This indicator will provide you with information about the battery’s current charge level. If the indicator shows that the battery is low, it’s time to recharge it before attempting to fly again.
How to recharge the drone battery:
1. Disconnect the battery from the drone by following the manufacturer’s instructions.
2. Locate the charger that came with your drone and plug it into a power outlet.

3. Connect the battery to the charger, making sure to align the polarity correctly.
4. Allow the battery to charge fully, which may take several hours depending on the battery’s capacity.
5. Once the battery is fully charged, disconnect it from the charger and reattach it to the drone.
After following these steps, try to take off again and see if the drone responds accordingly. If the drone still won’t take off, there may be other issues at play, such as a faulty motor or a calibration problem. In such cases, it’s best to consult the drone’s user manual or contact the manufacturer for further assistance.
Calibration issues
One of the most common reasons why a drone may not take off is due to calibration issues. Calibration is the process of ensuring that the drone’s sensors and components are properly aligned and functioning correctly. If any part of the drone is not properly calibrated, it can cause stability issues and prevent the drone from taking off.

There are several components that may require calibration, including the compass, gyroscope, and accelerometer. The compass is responsible for determining the drone’s heading, while the gyroscope measures rotation and the accelerometer measures acceleration. If any of these components are not calibrated correctly, it can result in the drone not being able to accurately determine its position and orientation.
To calibrate these components, you will need to consult your drone’s user manual as the process may vary depending on the make and model. In general, however, the calibration process involves placing the drone on a level surface and following the instructions provided by the manufacturer. This may include rotating the drone in a specific pattern or performing certain movements to allow the sensors to properly calibrate.
It’s important to note that calibration should be done in an open area away from any sources of electromagnetic interference, such as power lines or metal objects. These external factors can interfere with the calibration process and result in inaccurate readings.
If you have followed the calibration instructions provided by the manufacturer and are still experiencing issues, it’s recommended to contact customer support for further assistance. They may be able to provide additional troubleshooting steps or determine if there is a hardware issue with your drone.
| Issue | Possible Solution |
|---|---|
| Compass Calibration Error | Ensure there are no magnetic or metal objects nearby and follow the calibration instructions. |
| Gyroscope Calibration Error | Perform the recommended gyro calibration procedure as outlined in the user manual. |
| Accelerometer Calibration Error | Ensure the drone is on a level surface and follow the accelerometer calibration procedure. |
By properly calibrating your drone and addressing any calibration issues, you can improve its stability and ensure it takes off smoothly.

Motor failure
Motor failure is a common problem that can prevent your drone from taking off. There are several reasons why a motor may fail:
- Electrical issues: If there is a problem with the electrical connection to the motor, it may not receive the necessary power to function properly. Check all of the wiring and connections to ensure they are secure and intact.
- Overheating: Motors can overheat if they are continuously run for extended periods or if they are subjected to excessive stress. Allow the motors to cool down before attempting to fly the drone again.
- Damaged motor: Physical damage to the motor can cause it to fail. If the motor has been impacted or shows signs of wear and tear, it may need to be replaced.
- Software issues: Sometimes, motor failure can be caused by software glitches or errors. Try resetting the drone’s software or updating it to the latest version.
- Controller problems: If the drone’s controller is not functioning correctly, it may not be sending the proper signals to the motors. Check the controller’s batteries and ensure that it is properly synced with the drone.
If you have checked all of these potential issues and the drone still won’t take off, it may be necessary to seek professional assistance or contact the manufacturer for further troubleshooting and repair options.
GPS signal interference
One possible reason why your drone may not be taking off is due to GPS signal interference. Drones heavily rely on GPS to navigate and maintain stability in-flight. If the GPS signals are disrupted or weak, it can prevent the drone from functioning properly.
GPS signal interference can be caused by various factors, including:
1. Physical obstacles:
Buildings, trees, or other structures can obstruct the GPS signals, preventing the drone from receiving accurate location information. It is important to ensure that you are flying the drone in an open area with minimal obstructions for better signal reception.
2. Electromagnetic interference (EMI):
EMI from nearby electronic devices, power lines, or radio transmissions can interfere with the GPS signals and disrupt the drone’s ability to communicate with the satellites. Avoid flying the drone near high-voltage power lines or in areas with strong radio signals to minimize EMI.
In order to troubleshoot GPS signal interference, you can:
| Steps | Description |
|---|---|
| 1 | Check for physical obstacles |
| 2 | Move to an open area with better GPS reception |
| 3 | Avoid flying near high-voltage power lines or areas with strong radio signals |
| 4 | Try using a GPS signal amplifier |
| 5 | Update the drone’s firmware |
By following these steps, you can improve the GPS signal reception and increase the chances of your drone taking off successfully.
Propeller issues
If your drone won’t take off, one potential issue could be with the propellers. It’s important to check if the propellers are securely attached and undamaged. If any propellers are loose or damaged, they will not generate enough thrust to lift the drone off the ground.
First, carefully inspect each propeller for any visible damage, such as cracks or breaks. If you notice any damage, replace the propeller with a new one. Make sure to check that the new propeller is properly aligned and securely attached to the motor.
Even if the propellers appear undamaged, they might not be spinning freely. Debris such as dirt, hair, or small objects can get stuck in the propellers, preventing them from rotating properly. Inspect each propeller closely and remove any debris that you find.
Additionally, propellers can become unbalanced over time, which can cause vibrations and affect the stability of the drone during takeoff. To check the balance of the propellers, you can use a propeller balancer or perform a visual inspection. If you notice any imbalance, try swapping propellers between motors to see if the issue persists.
Remember: Always follow the manufacturer’s instructions when dealing with propeller issues and ensure that you are using the correct propellers for your drone model.
If you have checked the propellers and the issue still persists, it is recommended to contact the manufacturer or seek professional assistance for further troubleshooting.
Weight limit exceeded
A common reason why a drone might not take off is if the weight limit has been exceeded. Drones are designed to carry a specific weight, and if that weight is exceeded, it can put strain on the motors and prevent the drone from safely taking off.
It is important to check the weight capacity of your drone before attempting to fly it. This information can usually be found in the user manual or on the manufacturer’s website. Make sure to include the weight of any accessories or payloads that you have attached to the drone, such as cameras or additional batteries.
If you find that you are exceeding the weight limit, you may need to remove some accessories or consider purchasing a larger drone that can handle a higher payload. It is also worth noting that exceeding the weight limit can void any warranties or insurance you may have on the drone, so it is important to fly within the specified limits.
Tips to stay within the weight limit:
- Remove any unnecessary accessories or payloads
- Weigh your drone and all attached accessories before flying
- Consider purchasing a larger drone with a higher weight capacity if needed
- Familiarize yourself with the weight limits and guidelines provided by the drone manufacturer
Conclusion
Ensuring that you do not exceed the weight limit of your drone is essential for safe and successful flights. By understanding the weight capacity of your drone and following the manufacturer’s guidelines, you can avoid potential damage to your drone and fly with confidence.
Software or firmware update required
If your drone is not taking off, one possible reason could be that it requires a software or firmware update. Similar to any electronic device, drones often receive updates to improve their performance, fix bugs, or add new features. Failing to update the software or firmware can sometimes lead to issues with the drone’s functionality.
Before attempting a flight, check if there are any available updates for your drone’s software or firmware. Manufacturers often provide these updates on their websites or through dedicated software applications.
To update the software or firmware, follow the instructions provided by the manufacturer. This usually involves connecting your drone to a computer, downloading the update file, and then transferring it to the drone.
It is important to ensure that you have a stable and reliable internet connection when downloading updates. Interrupted or incomplete downloads can result in errors and unstable performance.
Keep in mind that different drones require different update processes, so always refer to the manufacturer’s instructions specific to your model.
Common symptoms that indicate a software or firmware update is needed include:
1. Glitches or crashes during flight: If your drone experiences sudden and unexpected glitches or crashes while flying, it could be a sign that a software or firmware update is required. These updates often include fixes for stability and performance issues.
2. Inability to connect or sync with the controller: If your drone is not connecting or syncing with the controller, it may be due to a compatibility issue between the software or firmware versions. Updating the drone’s software or firmware can resolve this problem.
By regularly checking for updates and keeping your drone’s software or firmware up to date, you can ensure optimal performance and minimize the risk of encountering issues during flights.
Environmental factors
There are several environmental factors that can prevent your drone from taking off. Understanding these factors and taking appropriate action can help ensure a successful flight.
1. Wind: Strong winds can make it difficult for a drone to maintain stability and control. If the wind speed exceeds the drone’s capabilities, it may not be able to take off safely. Check the weather conditions before flying and avoid flying in high winds.
2. Rain or moisture: Drones are not typically designed to fly in wet conditions. Rain or moisture can damage the electronic components or interfere with the propellers’ performance, causing the drone to malfunction or crash. It’s best to avoid flying in rainy or humid conditions.
3. Temperature extremes: Extreme temperatures can affect the performance of your drone. In cold weather, the battery life may be reduced, and the drone may not have enough power to take off or fly properly. In hot weather, the heat can cause the components to overheat, leading to malfunctions. It’s important to operate your drone within the recommended temperature range specified by the manufacturer.
4. Obstacles: Make sure there are no obstacles or obstructions in the flight path of your drone. Trees, buildings, power lines, or other objects can interfere with the drone’s flight and cause it to crash. Always choose an open area for flying and maintain a safe distance from any potential obstacles.
5. GPS signal: Some drones rely on GPS signals for navigation and stabilization. If there is a weak GPS signal or interference, the drone may not be able to take off or may experience difficulties during flight. Ensure that you have a strong GPS signal before attempting to fly your drone.
By considering these environmental factors and taking precautions, you can increase the chances of a successful and safe drone flight.
Question-answer:
Why won’t my drone take off?
There could be several reasons why your drone won’t take off. One possibility is that the battery is not charged or is not inserted properly. Another reason could be that the propellers are damaged or not properly attached. It’s also possible that the drone is not calibrated correctly or that there is interference from nearby electronic devices. It’s important to troubleshoot each of these issues to determine the cause of the problem.
What should I do if my drone doesn’t take off?
If your drone doesn’t take off, the first thing you should do is check the battery. Make sure it is fully charged and properly inserted into the drone. Next, inspect the propellers to ensure they are not damaged and are properly attached. If everything seems to be in order, try calibrating the drone according to the manufacturer’s instructions. If all else fails, it’s possible that there is interference from nearby electronic devices, so try flying the drone in a different location.
Can I fly my drone indoors?
Flying a drone indoors can be tricky and is not recommended for beginners. Indoor spaces often have limited room for the drone to maneuver, increasing the risk of crashing into objects or people. Additionally, there may be interference from electronic devices that can affect the drone’s flight stability. If you do choose to fly your drone indoors, make sure you have a clear and open space, away from fragile or valuable objects. It’s also important to be familiar with the drone’s controls and practice flying in a controlled manner.
Why is my drone not responding to the controller?
If your drone is not responding to the controller, there could be several reasons. First, make sure that the controller is fully charged and has fresh batteries. Check that both the drone and the controller are turned on and that they are properly connected. If they are connected, try recalibrating the controller. It’s also important to be within range of the drone and to have a clear line of sight. If the problem persists, there may be a malfunction with either the drone or the controller, and it may need to be repaired or replaced.