If you’re an avid photographer or astronomy enthusiast, you may be wondering whether a digital camera can be used in conjunction with a telescope. The answer is a resounding yes! In fact, combining a digital camera with a telescope opens up a whole new world of possibilities for capturing stunning images of the night sky.
By attaching a digital camera to a telescope, you can take high-resolution photographs of celestial objects like the moon, planets, and even distant galaxies. This technique, known as astrophotography, allows you to capture intricate details and reveal the beauty of the universe in ways that are impossible with the naked eye.
However, it’s important to note that using a digital camera with a telescope requires some additional equipment and techniques. You’ll need to have an adapter or a T-ring that allows you to connect your camera to the telescope’s eyepiece. This ensures that the camera is properly aligned and positioned to capture the desired celestial objects.
Additionally, using a digital camera through a telescope may also require longer exposure times and specialized settings to capture the faint light of distant celestial objects. Adjusting the camera’s ISO, aperture, and shutter speed settings can help you optimize the image quality and bring out the details in your astrophotography.
It’s also worth mentioning that using a digital camera through a telescope can be a rewarding and challenging hobby. It requires patience, practice, and a keen eye for composition. But with the right equipment and a little experimentation, you’ll be able to create breathtaking images that showcase the wonders of the universe.

In conclusion, a digital camera can indeed work through a telescope, opening up endless possibilities for capturing the beauty of the night sky. With the right equipment and techniques, you’ll be able to create stunning astrophotography that will leave you awe-inspired.
Can You Use a Digital Camera With a Telescope?
Yes, you can use a digital camera with a telescope. Using a digital camera with a telescope can allow you to capture stunning images of celestial objects such as the moon, planets, stars, and even galaxies. The process involves attaching your digital camera to the telescope using a special adapter, which allows you to connect the camera to the eyepiece or the telescope’s focuser.
There are a few things to consider when using a digital camera with a telescope:
- Choose the right telescope: Not all telescopes are suitable for astrophotography. You’ll need a telescope that has a sturdy mount and is capable of tracking celestial objects accurately. Refractor telescopes and Schmidt-Cassegrain telescopes are commonly used for astrophotography.
- Use the right adapter: To attach your digital camera to the telescope, you’ll need a camera adapter or T-ring specific to your camera’s make and model. This adapter allows you to securely connect your camera to the telescope.
- Understand the telescope’s focal length: The focal length of a telescope determines its magnification power. Understanding the focal length will help you determine the appropriate camera settings for capturing clear and detailed images.
- Use a remote shutter release: To minimize camera shake and ensure sharp images, it’s best to use a remote shutter release or a timer function on your camera. This will allow you to trigger the camera without physically touching it.
- Experiment with exposure settings: Astrophotography often requires longer exposure times to capture faint objects. Adjusting the camera’s ISO, aperture, and exposure time can help you achieve the desired level of brightness and detail in your images.
Keep in mind that astrophotography through a telescope requires patience and practice. It may take some time to familiarize yourself with the equipment and techniques needed to capture high-quality images. However, with the right equipment and a little practice, using a digital camera with a telescope can open up a whole new world of stunning celestial photography.
Note: Before attempting any astrophotography, it’s important to do proper research and ensure you are using the appropriate equipment and following safety guidelines.

Understanding the Basics
Cameras and Telescopes:
Before we delve into the details of using a digital camera with a telescope, it’s important to understand the basics of how cameras and telescopes work. A camera captures light and converts it into an electronic signal that can be stored and displayed as an image. On the other hand, a telescope gathers and magnifies light from distant objects, allowing us to see them more clearly.
Optical Systems:
Both cameras and telescopes are optical systems, but they serve different purposes. A camera is designed to capture and record images, while a telescope is designed to observe and magnify objects in the sky. The lens of a camera focuses light onto a sensor, while the lens of a telescope gathers and focuses light from distant objects.
Mounting a Camera on a Telescope:

In order to use a digital camera with a telescope, you will need to mount the camera onto the telescope. This can be done using various adapters and mounting systems that are available specifically for this purpose. By attaching the camera to the telescope, you can take advantage of the telescope’s magnification power to capture detailed images of distant objects.
Camera Compatibility:
It’s important to note that not all digital cameras are compatible with telescopes. To ensure compatibility, you will need to check if your camera has a removable lens and if it can be attached to a telescope adapter. Additionally, some cameras may require specific adapters or additional accessories to work effectively with a telescope.
Understanding the Telescope’s Limitations:
It’s also important to understand the limitations of using a camera with a telescope. The quality of the images captured will depend on various factors such as the telescope’s optics, the camera’s capabilities, and the atmospheric conditions. Additionally, capturing images of celestial objects requires knowledge of astrophotography techniques and post-processing methods.
Conclusion:
Using a digital camera with a telescope can open up a new world of possibilities in astrophotography. However, it’s crucial to have a good understanding of the basics before venturing into this field. By understanding how cameras and telescopes work together, the compatibility requirements, and the limitations involved, you can make informed decisions and enhance your astrophotography skills.
Compatibility Factors to Consider
When using a digital camera with a telescope, there are a few compatibility factors that you should consider:
1. Mounting Compatibility
Before attempting to attach your digital camera to a telescope, it’s important to check if they are compatible when it comes to mounting. Telescopes often have specific adapters or accessories that allow cameras to be connected to them. Make sure to choose the right adapter for your camera model and telescope.
2. Focal Length
The focal length of your telescope will also affect the compatibility with a digital camera. Telescopes with longer focal lengths provide higher magnification but may result in a narrower field of view. This can make it more difficult to capture wide-angle images. On the other hand, telescopes with shorter focal lengths allow for wider field of view, but with lower magnification. Consider the type of photography you intend to do and choose a telescope with an appropriate focal length.

3. Image Sensor Size
The size of the image sensor in your digital camera is another important factor to consider. Telescopes often produce high-magnification images that require a larger sensor to capture all the details effectively. A larger sensor allows for better resolution and image quality. If your camera has a small image sensor, you may not be able to capture the full extent of the telescope’s capabilities.
4. Compatibility with Telescope’s Eyepiece
Some digital cameras may require the use of an eyepiece projection adapter to connect to a telescope. Check if your camera is compatible with such adapters and if they are available for your specific camera model and telescope. These adapters allow you to attach the camera directly to the eyepiece, providing a convenient way to capture images through the telescope.
5. Camera Settings and Control
Consider the level of control your digital camera offers when it comes to exposure settings. Some cameras may have limitations when it comes to adjusting settings like shutter speed, aperture, and ISO, which can affect the overall quality of images taken through a telescope. Look for a camera that provides manual control over these settings for better results.
By considering these compatibility factors, you can ensure that your digital camera works effectively with your telescope, allowing you to capture stunning images of the night sky.
Adapting Your Camera to a Telescope
Using a digital camera with a telescope can open up a whole new world of astrophotography. By attaching your camera to the eyepiece of a telescope, you can capture stunning images of celestial objects and share your passion for astronomy with others. Here are some tips on how to adapt your camera to a telescope:
- Find the right adapter: To connect your camera to a telescope, you will need a camera-to-telescope adapter. There are different types available, depending on the make and model of your camera and telescope. Make sure to do your research and choose the one that is compatible with your equipment.
- Align the camera and telescope: Once you have the adapter, attach it to your camera and then connect it to the eyepiece of the telescope. Ensure that the camera is aligned with the telescope’s optical axis to achieve proper focus and framing.
- Set the focus: Most digital cameras allow you to manually adjust the focus. Take a few test shots and fine-tune the focus until you achieve crisp and clear images. Some camera models also offer the option of using auto-focus, which can be handy for capturing moving objects.
- Experiment with exposure settings: Astrophotography often requires longer exposure times to capture faint objects in the night sky. Adjust the camera’s exposure settings accordingly to achieve the desired level of brightness and detail in your images. You may also want to consider using a remote shutter release or a timer to minimize camera shake.
- Practice and experiment: The key to successful astrophotography is practice and experimentation. It may take some time to master the techniques and settings that work best for your camera and telescope setup. Don’t be afraid to try different approaches and learn from your results.
Remember, adapting your camera to a telescope can be a fun and rewarding way to explore the cosmos. With some patience and practice, you can capture stunning images of distant galaxies, planets, and nebulae that will leave you in awe of the universe’s beauty.
Choosing the Right Lens and Mount
When it comes to using a digital camera through a telescope, choosing the right lens and mount is crucial for getting the best results. Here are a few considerations to keep in mind:
1. Focal Length: The focal length of the lens will determine the magnification and field of view of the image. A longer focal length will result in higher magnification, but a narrower field of view. On the other hand, a shorter focal length will provide a wider field of view, but lower magnification. Consider what you want to capture and choose a lens with an appropriate focal length.
2. Aperture: The aperture of the lens determines how much light it can gather. A larger aperture allows more light to reach the camera’s sensor, which is especially important for capturing dim objects in the night sky. Look for lenses with wide apertures to ensure good image quality.
3. Mount Compatibility: Ensure that the lens you choose is compatible with the mount of your telescope. Different telescopes have different types of mounts, such as T-mounts or camera-specific adapters. Make sure you have the necessary adapters or mounts to connect your camera to the telescope.

| Camera Lens | Focal Length | Aperture | Mount Compatibility |
|---|---|---|---|
| Canon EF 50mm f/1.8 STM Lens | 50mm | f/1.8 | T-mount or Canon EF mount |
| Nikon AF-S FX NIKKOR 35mm f/1.8G Lens | 35mm | f/1.8 | T-mount or Nikon F mount |
| Sony FE 85mm f/1.8 Lens | 85mm | f/1.8 | T-mount or Sony E mount |
4. Image Stabilization: Consider using a lens with image stabilization to reduce any vibration or motion blur that can occur when capturing images through a telescope. This can help improve the overall clarity and sharpness of your photographs.
By taking these factors into account and choosing the right lens and mount, you can ensure that your digital camera will work effectively through a telescope and capture stunning images of the night sky.
Tips for Getting the Best Results
1. Use a sturdy tripod: To ensure sharp and stable images, it is essential to mount your digital camera on a sturdy tripod. This will minimize vibrations and prevent blurring during long-exposure shots.
2. Adjust the camera settings: Experiment with different camera settings such as ISO, shutter speed, and aperture to find the optimal settings for capturing celestial objects. Increase the ISO for better light sensitivity, use a longer shutter speed for capturing dim objects, and adjust the aperture to control the depth of field.
3. Manual focus: Set your camera to manual focus mode and adjust the focus manually to achieve a crisp and clear image. Automatic focus may struggle when capturing distant objects through a telescope.
4. Use a remote shutter release: To minimize the risk of camera shake, use a remote shutter release or the self-timer function to trigger the camera. This will ensure that there is no movement when the photo is taken.
5. Experiment with exposure times: Depending on the object being photographed and the level of light pollution, you may need to experiment with different exposure times. Start with shorter exposures and gradually increase the duration until you achieve the desired results.
6. Consider using a dedicated astrophotography camera: While digital cameras can work through a telescope, dedicated astrophotography cameras are specifically designed for capturing the night sky and often produce better results. If you are serious about astrophotography, investing in a dedicated camera may be worth considering.
7. Take multiple shots: Capture multiple shots of the same object with varying settings to increase your chances of getting the perfect shot. This will give you more options during post-processing and allow you to choose the best image.
8. Use image stacking software: Image stacking software can help combine multiple images of the same object, reducing noise, and improving overall image quality. This technique can enhance faint details and reveal more information in your astrophotographs.
9. Practice and be patient: Astrophotography can be challenging, and it may take some practice to get the best results. Be patient, experiment with different techniques, and don’t get discouraged if your first attempts don’t turn out as expected. With time and practice, you will improve and capture stunning images of the cosmos.
Alternative Options for Astrophotography
Apart from using a digital camera through a telescope, there are several alternative options for astrophotography enthusiasts to capture stunning images of celestial objects:
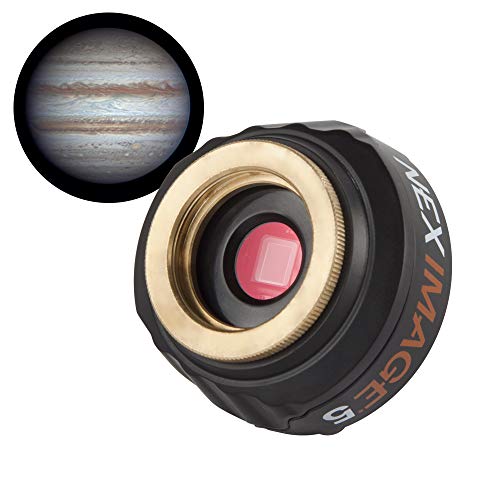
1. CCD Imaging: Charge-coupled device (CCD) cameras are specifically designed for astronomy and offer high sensitivity and low noise. These cameras are often used in conjunction with telescopes to capture detailed images of planets, galaxies, and nebulae.
2. DSLR Cameras: Digital single-lens reflex (DSLR) cameras are commonly used by astrophotographers due to their versatility and ability to capture high-quality images. DSLRs can be connected to telescopes using adapters, allowing photographers to take advantage of the telescope’s focal length.
3. Webcams: Webcams can be a cost-effective option for capturing images of planets and the Moon. With the right software, webcams can capture video footage of celestial objects, which can then be processed to create still images.
4. Smartphone Cameras: Many smartphones today are equipped with high-quality cameras that can be used for astrophotography. With the aid of special apps and mounting equipment, smartphone cameras can capture impressive images of the Moon, planets, and even some deep-sky objects.
5. Dedicated Astrophotography Cameras: There are several camera models specifically designed for astrophotography, such as the Canon EOS Ra and the Sony Alpha a7S III. These cameras often have features like enhanced low-light sensitivity and specialized filtration options for capturing stunning images of the night sky.
Each of these alternative options provides astrophotographers with different capabilities and advantages. It’s important to choose the option that best suits your needs and budget for capturing breathtaking images of the cosmos.
Question-answer:
Can I attach a digital camera to my telescope to take photos of celestial objects?
Yes, you can attach a digital camera to your telescope to capture images of celestial objects. By using a technique called “prime focus photography,” where the camera is essentially acting as the telescope’s eyepiece, you can capture clear and detailed images of the night sky.
What type of digital camera should I use for astrophotography through a telescope?
For astrophotography through a telescope, it is recommended to use a digital single-lens reflex (DSLR) camera. DSLRs offer more control over settings such as exposure time, ISO sensitivity, and focusing, allowing you to capture high-quality images of celestial objects. However, point-and-shoot cameras with manual settings can also be used, although they may have limitations in terms of capturing faint objects.
Do I need any additional equipment to attach my digital camera to a telescope?
Yes, you will need some additional equipment to connect your digital camera to a telescope. You will need a T-ring that is specifically designed for your camera model, which acts as an adapter to attach the camera to the telescope’s focuser. Additionally, you may require a T-adapter or an eyepiece projection adapter, depending on the specific setup you are using. These accessories can be purchased online or at astronomy specialty stores.


