
Canon DSLR cameras are known for their high-quality image capturing capabilities and advanced features. Whether you are a beginner or a professional photographer, understanding how to operate a Canon DSLR camera is essential to maximize its potential and enhance your photography skills.
This guide will provide you with step-by-step instructions on how to operate a Canon DSLR camera, from basic settings to advanced shooting modes.
Firstly, familiarize yourself with the basic functions of your Canon DSLR camera. The camera’s power button is usually located on the top or back of the device. Press and hold this button to turn on the camera. Once the camera is powered on, you can adjust the settings using the buttons and dials located on the camera body.
The LCD screen on the back of the camera is where you can view your images, access the camera’s menu, and make adjustments. Use the menu button to navigate through the options and the scroll wheel to select different settings.
To ensure proper focus, use the autofocus feature of the camera. Press the AF-ON button located near the viewfinder to activate autofocus. This will help you capture sharp and clear images.

Choosing the right DSLR camera
When it comes to selecting a DSLR camera, there are several factors to consider in order to make an informed decision. The right camera will depend on your specific needs and preferences, as well as your level of expertise.
Here are some important aspects to consider when choosing a DSLR camera:
| Sensor size: | The size of the image sensor can greatly impact the image quality. Generally, larger sensors offer better low-light performance and greater dynamic range. |
| Resolution: | The number of megapixels determines the level of detail in your photos. Higher resolution cameras are ideal for printing large-sized images or cropping photos without compromising quality. |
| ISO range: | The ISO range indicates the camera’s sensitivity to light. Cameras with a wider ISO range are more versatile and can handle various lighting conditions. |
| Autofocus system: | Consider the autofocus system of the camera, including the number of focus points and the speed and accuracy of the autofocus. This is especially important for capturing fast-moving subjects or shooting in low-light situations. |
| Video capabilities: | If you plan to shoot videos, check for the camera’s video capabilities, such as resolution, frame rate, and the availability of manual controls for video settings. |
| Size and weight: | Consider the size and weight of the camera, especially if you plan to carry it around with you frequently. A lighter and more compact camera may be preferable for travel or street photography. |
| Price: | Set a budget for your DSLR camera and consider the value for money. There are different DSLR models available at various price points, so choose one that fits your budget and requirements. |
Ultimately, the right DSLR camera for you will depend on your specific needs and preferences. Make sure to do thorough research, read reviews, and compare different models before making a purchase.
Understanding the Basic Controls
Operating a Canon DSLR camera can seem intimidating at first, but understanding the basic controls is crucial for capturing high-quality photos and videos. In this section, we will explore the main controls you need to know to get started with your Canon DSLR.
1. Power Switch
The power switch is located on the top of the camera body and is used to turn the camera on and off. When the camera is off, make sure to keep the lens cap on to protect the lens.

2. Mode Dial
The mode dial allows you to select the shooting mode. This dial is usually located on the top of the camera and includes options such as Manual (M), Aperture Priority (Av), Shutter Priority (Tv), and Auto (A). Each mode has different settings and gives you control over various aspects of your images.
3. Shutter Button
The shutter button is used to capture photos. Pressing the button halfway focuses the subject, and pressing it all the way down takes the photo. Make sure to hold the camera steady to avoid blurry images.
4. Control Wheel
The control wheel is located on the back of the camera and is used to adjust settings such as aperture, shutter speed, and ISO. It is a convenient way to navigate through menus and make quick adjustments while shooting.
5. Display Screen
The display screen on the back of the camera shows you a live view of what the camera sees. It also displays settings, menus, and playback options. Use the display screen to review your photos, adjust settings, and navigate through menus.
6. Menu Button
The menu button allows you to access the camera’s menu, where you can customize various settings and options according to your preferences. Use the control wheel or arrow buttons to navigate through the menu and make adjustments.
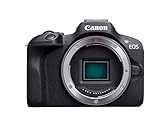
![Canon DSLR Camera [EOS 90D] with Built-in Wi-Fi, Bluetooth, DIGIC 8 Image Processor, 4K Video, Dual Pixel CMOS AF, and 3.0 Inch Vari-Angle Touch LCD Screen, [Body Only], Black](https://m.media-amazon.com/images/I/41JtOF3xVBL._SL160_.jpg)
7. Playback Button
The playback button is used to review the photos you have taken. Pressing this button displays the images on the screen, allowing you to zoom in, delete, or protect photos from accidental deletion.
Understanding these basic controls will give you a solid foundation to operate your Canon DSLR camera. Remember to consult your camera’s manual for more detailed information on specific controls and functions.
Configuring the settings
Configuring the settings on your Canon DSLR camera is essential for capturing the best possible photos and videos. By adjusting various settings, you can customize the camera to suit your specific shooting needs and preferences. Here are some important settings you should consider:
- Image quality: Set the image quality to RAW or JPEG, depending on your preference. RAW files retain more detail and allow for greater flexibility in post-processing, while JPEG files are smaller and more convenient for sharing.
- ISO sensitivity: Adjust the ISO sensitivity to control the camera’s sensitivity to light. Lower ISO values (e.g., 100) are ideal for well-lit environments, while higher values (e.g., 1600 or above) are suitable for low-light conditions.
- White balance: The white balance setting determines the color temperature of your photos. Use the auto white balance mode for most situations, or manually adjust it for specific lighting conditions such as daylight, cloudy, or tungsten.
- Exposure mode: Choose the exposure mode that best suits your shooting style. The Manual (M) mode gives you full control over all settings, while the Aperture Priority (Av) and Shutter Priority (Tv) modes allow you to prioritize aperture or shutter speed, respectively.
- Focus mode: Select the focus mode depending on your subject and shooting conditions. The One Shot autofocus mode is suitable for stationary subjects, while AI Servo is ideal for continuous autofocus tracking of moving subjects.
- Drive mode: Configure the drive mode to control the sequence of shots. The Single Shot mode takes one photo at a time, while the Continuous mode captures multiple shots in rapid succession. The Self-Timer mode is useful when you want to take a photo with a delayed shutter release.
Remember to consult your camera’s user manual for detailed instructions on how to access and adjust these settings. Experimenting with different configurations will help you become familiar with your camera and improve your photography skills over time.
Taking high-quality photos
When operating a Canon DSLR camera, capturing high-quality photos requires attention to detail and understanding of various camera settings.
![Canon DSLR Camera [EOS 90D] with 18-135 IS USM Lens | Built-in Wi-Fi, Bluetooth, DIGIC 8 Image Processor, 4K Video, Dual Pixel CMOS AF, and 3.0 Inch Vari-Angle Touch LCD Screen, Black](https://m.media-amazon.com/images/I/41lPN2sI1JL._SL160_.jpg)
1. Choose the right shooting mode
The shooting mode on your Canon DSLR camera determines how much control you have over the camera settings. For beginners, using the “Auto” mode can be a good starting point as it allows the camera to automatically adjust settings like aperture, shutter speed, and ISO based on the lighting conditions.
However, to have more control and achieve better results, consider using the “Aperture Priority” or “Shutter Priority” modes. In the “Aperture Priority” mode, you can adjust the aperture to control the depth of field and create a blurry background effect. In the “Shutter Priority” mode, you can adjust the shutter speed to capture motion or freeze action.
2. Pay attention to lighting
Lighting plays a crucial role in photography, and understanding how to work with different lighting conditions can greatly improve the quality of your photos. Natural light is often the best option for capturing high-quality images, so try to shoot during the “golden hours” of sunrise and sunset when the light is soft and warm.
If you’re shooting indoors or in low-light situations, consider using an external flash or adjusting the ISO settings on your camera to capture more light. Avoid using the built-in flash unless necessary, as it can produce harsh lighting and unflattering shadows.
3. Utilize composition techniques
Composition is another important aspect of taking high-quality photos. Consider using the rule of thirds, which involves dividing the frame into a grid of nine equal sections and placing key elements along the grid lines or at their intersections. This technique creates a more balanced and visually appealing image.

Experiment with different angles and perspectives to add interest to your photos. Get low to the ground or climb higher to change the point of view and capture unique shots. Also, pay attention to the background and remove any distractions that could take away from the main subject.
4. Post-processing and editing
Once you’ve captured your photos, post-processing and editing can help enhance their quality. Use photo editing software like Adobe Lightroom or Canon’s Digital Photo Professional to adjust brightness, contrast, and color levels. You can also crop your images to improve composition or apply filters for a specific look.
Remember not to overdo the editing and strive for a natural and realistic result. Experiment with different settings and find a style that suits your photography preferences.
| Tip | Example |
|---|---|
| Use a tripod | When shooting in low light or capturing long exposure photos, using a tripod can significantly reduce camera shake and result in sharper images. |
| Shoot in RAW format | RAW files contain more image data and allow for more flexibility in post-processing compared to JPEG files. Shooting in RAW format gives you greater control over the final result. |
| Experiment with different lenses | Investing in lenses with different focal lengths can expand your creative possibilities and help you achieve different perspectives and effects in your photos. |
By following these tips and techniques, you can improve your skills in taking high-quality photos with your Canon DSLR camera. Practice and experimentation will ultimately help you develop your unique style and capture impressive images.
Working with different lenses
One of the advantages of using a Canon DSLR camera is the ability to interchange different lenses, offering a wide range of creative options for photographers. Each lens has its own unique qualities and characteristics that can enhance your photography.

1. Prime lenses: Prime lenses have a fixed focal length, which means they do not zoom. These lenses are known for their excellent image quality and wide maximum aperture, allowing for low light photography and shallow depth of field. They are ideal for portrait photography and capturing crisp, detailed images.
2. Zoom lenses: Zoom lenses, on the other hand, offer a variable focal length, allowing you to adjust the magnification and zoom in or out. These lenses are versatile and great for capturing a wide range of subjects, such as landscapes, events, and wildlife. They offer convenience and flexibility, as you can easily change the composition of your shots without having to physically move.
3. Macro lenses: Macro lenses are designed for close-up photography, allowing you to capture intricate details with high magnification. These lenses are perfect for capturing the beauty of flowers, insects, and other small subjects. They offer excellent image sharpness and clarity at close range.
4. Telephoto lenses: Telephoto lenses have a long focal length, enabling you to capture distant subjects with great detail. These lenses are ideal for wildlife photography, sports events, and any situation where you can’t physically get close to your subject. They offer a narrow field of view, allowing you to isolate your subject and create stunning, compressed perspectives.
5. Wide-angle lenses: Wide-angle lenses have a shorter focal length, providing a wider field of view and allowing you to capture more of the scene in your frame. These lenses are great for landscape photography, architecture, and group shots. They can create a sense of depth and perspective, making your images more immersive and dynamic.
Remember: When changing lenses on your Canon DSLR camera, always be careful and do it in a clean environment to avoid dust or debris from entering the camera body. Additionally, be mindful of the compatibility between your camera and the lens you are using, as not all lenses are compatible with all Canon DSLR models. Consult the camera’s manual or the manufacturer’s website for more information.
Exploring advanced features
Once you have become familiar with the basic features of your Canon DSLR camera, you may want to start exploring its advanced options. These features will allow you to take your photography skills to the next level and capture stunning images.
1. Manual mode
One of the advanced features of a Canon DSLR camera is the manual mode. In this mode, you have complete control over the settings, such as aperture, shutter speed, and ISO. This gives you the flexibility to experiment and achieve the desired exposure and depth of field. It may take some practice to get the hang of it, but mastering manual mode will greatly enhance your photography skills.
2. Custom functions
Canon DSLR cameras offer a range of custom functions that allow you to personalize your camera settings according to your preferences. These functions include assigning custom buttons, adjusting autofocus settings, and creating your own picture style. Exploring and utilizing these custom functions will enable you to optimize your camera’s performance and tailor it to your specific shooting needs.
Additionally, Canon DSLR cameras often come with built-in Wi-Fi or Bluetooth connectivity, enabling you to easily transfer your images to your smartphone or tablet for quick editing and sharing. Some models also offer GPS functionality, allowing you to geotag your photos and see the exact location where each shot was taken.
By taking the time to understand and experiment with the advanced features of your Canon DSLR camera, you will be able to unlock its full potential and take your photography to new heights.
Troubleshooting common issues
Using a Canon DSLR camera can sometimes bring up a few common issues that may cause frustration. Below are some troubleshooting tips for resolving these issues:
| Issue | Possible Solution |
|---|---|
| The camera won’t turn on | Make sure the battery is properly inserted and charged. Try a different battery or power source to eliminate the possibility of a faulty battery or charger. |
| The camera is not focusing | Check if the lens is set to autofocus mode. Clean the lens contacts with a lint-free cloth. Reset the camera to its factory settings if necessary. If the issue persists, the lens or autofocus mechanism may need to be serviced. |
| The images are blurry | Ensure that the lens is properly focused by half-pressing the shutter button. Use a tripod or stabilize the camera to avoid camera shake. Adjust the aperture, shutter speed, or ISO settings to achieve the desired sharpness. |
| The camera is not connecting to the computer | Check if the USB cable is securely connected to both the camera and the computer. Try using a different USB port or cable to eliminate the possibility of a faulty connection. Install or update the necessary drivers or software for your camera model. |
| The camera is displaying error messages | Refer to the camera’s user manual or the Canon website for information on the specific error message. Follow the recommended steps to resolve the issue, such as formatting the memory card or resetting the camera. |
If you encounter any other issues not mentioned here, it’s recommended to consult the camera’s user manual or contact Canon customer support for further assistance.
Post-processing your images
After capturing photos with your Canon DSLR camera, it’s important to enhance and refine them through post-processing. This allows you to bring out the best in your images, correct any imperfections, and create a polished final result. Here are some steps to guide you through the post-processing process:
1. Importing your images
The first step in post-processing is importing your images into a computer or editing software. Connect your camera to your computer using a USB cable or insert the memory card into a card reader. Use your preferred software, such as Adobe Lightroom or Canon Digital Photo Professional, to import the photos.
2. Organizing and selecting
Once your images are imported, organize them into folders or collections. This will help you stay organized and easily find specific photos later. Review your images and select the ones you want to work on further. Delete any duplicates or low-quality shots to save storage space.
3. Adjusting exposure and white balance
Start by adjusting the exposure and white balance of your images. These settings can greatly impact the overall look and feel of the photo. Use the histogram as a reference to ensure proper exposure levels, and adjust the white balance to match the lighting conditions at the time of capture.
4. Enhancing colors and tones
Next, enhance the colors and tones of your images to make them more vibrant and visually appealing. Use tools like saturation, vibrance, and curves to adjust the overall color balance and bring out the details in shadow and highlight areas.
5. Sharpening and noise reduction
To improve the sharpness and clarity of your images, apply sharpening techniques. Be careful not to over-sharpen, as it can introduce artifacts. Additionally, reduce any unwanted noise that may be present in your images, especially in low-light or high ISO situations.
6. Cropping and straightening
If needed, crop and straighten your images to improve compositional balance and remove any distractions. A well-composed and level image can have a significant impact on its overall visual appeal.
7. Adding creative effects
Finally, consider adding creative effects to your images to express your artistic vision. Experiment with techniques like black and white conversion, selective coloring, or using filters to create a specific mood or atmosphere.
Remember, post-processing is a subjective process, and there is no right or wrong way to edit your images. It’s all about personal preference and achieving the desired outcome. Practice, experiment, and develop your own editing style to make your photos truly stand out.


