Have you ever wondered if it is possible to turn your iPhone into a heat sensing camera? Well, the good news is that it is indeed possible! With a few simple steps and the right equipment, you can transform your regular iPhone camera into a powerful heat sensing tool.
Using a heat sensing camera can have a wide range of applications. Whether you are interested in detecting energy leaks in your home, monitoring the temperature of your appliances, or even spotting wildlife during a nighttime hike, a heat sensing camera can be a valuable tool.
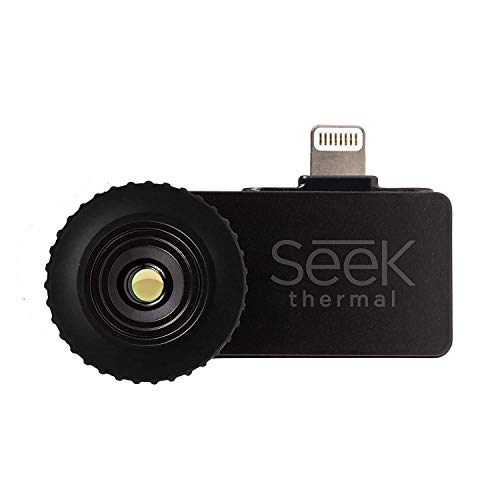
To make a heat sensing camera for your iPhone, you will need a few things. First and foremost, you will need an external thermal camera attachment that is compatible with your iPhone model. There are several options available on the market, ranging from affordable options to more professional-grade attachments.
Once you have the thermal camera attachment, the next step is to download a compatible app from the App Store. These apps are specifically designed to work with thermal camera attachments and allow you to capture and analyze thermal images and videos.
What is a heat sensing camera and why would you want one?
A heat sensing camera, also known as a thermal imaging camera, is a device that uses infrared radiation to capture and display the temperature distribution of objects and scenes. Unlike normal cameras that rely on visible light, heat sensing cameras detect the heat emitted by objects and convert it into an image that highlights variations in temperature.

How does a heat sensing camera work?
Thermal imaging technology is based on the principle that all objects emit heat in the form of infrared radiation. A heat sensing camera uses a special sensor, called a microbolometer, to detect this radiation. The microbolometer measures the intensity of the infrared radiation and creates a pixel-based representation of the temperature distribution in the scene.
Each pixel in the camera’s image corresponds to a specific temperature value. The camera then processes this information and generates a visual representation in different color gradients, with hotter objects appearing as brighter colors and cooler objects as darker colors.
Why would you want a heat sensing camera?
There are several practical applications for heat sensing cameras. One of the most common uses is in building inspections and energy auditing, where these cameras can detect areas of heat loss or insulation problems. They can also be used in electrical inspections to identify overheating components or areas of potential electrical malfunctions.
Heat sensing cameras can also have applications in hunting and wildlife observation, as they can help locate animals by their body heat signatures. They can be used for search and rescue operations, helping to detect individuals in low-visibility conditions or in disaster situations. In the medical field, these cameras can assist in diagnosing certain conditions by visualizing differences in skin temperature.
| Applications of Heat Sensing Cameras |
|---|
| Building inspections and energy auditing |
| Electrical inspections |
| Hunting and wildlife observation |
| Search and rescue operations |
| Medical diagnostics |
Benefits of a heat sensing camera for iPhone
A heat sensing camera for iPhone has numerous benefits that make it a valuable tool in various situations. Here are some of the advantages:

1. Enhanced thermal imaging capabilities
- With a heat sensing camera, your iPhone can detect and capture thermal images, enabling you to see the heat patterns of objects and people.
- This capability can be useful in a wide range of applications, including home inspection, electrical troubleshooting, and even search and rescue operations.
- By analyzing the thermal images, you can locate potential issues or anomalies that may not be visible to the naked eye, allowing for early detection and prevention of problems.
2. Increased safety and security
- A heat sensing camera can help you identify and assess potential safety hazards, such as overheating equipment or electrical hotspots.
- In industrial settings, it can be used to monitor the temperature of machinery, preventing equipment failure and ensuring worker safety.
- In home security, the camera can detect the presence of intruders by their body heat, providing an additional layer of protection.
3. Energy efficiency and cost savings
- By using a heat sensing camera, you can identify areas of heat loss in your home or office, helping you improve energy efficiency and reduce heating and cooling costs.
- The camera can also be used to assess the insulation effectiveness, detect air leaks, and optimize the performance of HVAC systems.
- By identifying energy-wasting areas, you can make informed decisions on insulation upgrades and other energy-saving measures.
Overall, a heat sensing camera for iPhone offers a range of benefits that can enhance safety, security, and energy efficiency in various settings. Its simplicity and portability make it a practical tool for both professionals and homeowners alike.
How to Make a Heat Sensing Camera for iPhone
Introduction:
Do you want to turn your iPhone into a heat sensing camera? With just a few simple steps, you can transform your iPhone into a powerful tool that can detect and visualize heat signatures. In this guide, we will walk you through the process of creating your own heat sensing camera for your iPhone.
Step 1: Gather the Materials
Before you start, make sure you have all the necessary materials. You will need an iPhone with a working camera, a thermal imaging camera module, a soldering iron, wires, and a heat sink. You can purchase the thermal imaging camera module online, and most of the other materials can be found at your local electronics store.

Step 2: Prepare Your iPhone
The next step is to prepare your iPhone for the thermal imaging camera module. Start by turning off your iPhone and removing the back cover. Carefully disconnect the existing camera module by unscrewing the screws and disconnecting the wires. Be cautious while doing this to avoid damaging any components.
Step 3: Install the Thermal Imaging Camera Module
Now, it’s time to install the thermal imaging camera module. Take the new camera module and connect it to the iPhone’s camera socket. Secure it in place by screwing in the screws and reconnecting the wires. Make sure the camera module is properly aligned and tightly secured.
Step 4: Solder the Wires
Using the soldering iron, solder the wires of the thermal imaging camera module to the corresponding points on the iPhone’s circuit board. This will ensure a proper connection between the camera module and the iPhone.
Step 5: Attach the Heat Sink
Attach a heat sink to dissipate any excess heat generated by the thermal imaging camera module. This will prevent any overheating issues and ensure the camera’s longevity. Make sure the heat sink is securely attached and does not block any important components of the iPhone.
Step 6: Test and Calibrate
Once you have completed the above steps, turn on your iPhone and open the thermal imaging camera app. Test the camera by aiming it at different heat sources and observing the captured images. To ensure accurate results, calibrate the camera by following the app’s instructions.

Conclusion:
Congratulations! You have successfully created your own heat sensing camera for your iPhone. Now you can use it for various applications such as home inspections, energy audits, and even wildlife tracking. Remember to always be cautious and safe when working with electronic components. Enjoy your new heat sensing camera!
Gather the necessary materials
Before you start making a heat sensing camera for your iPhone, you will need to gather a few essential materials. Here’s a list of what you will need:
- An iPhone (5S or later) with a rear-facing camera
- Thermal sensor module (such as the FLIR Lepton 3.5 or Seek Thermal Compact Pro)
- Electrical wires and connectors
- Soldering iron and solder
- Prototyping board
- Small screwdriver set
- Heat shrink tubing
- Electrical tape
- USB cable (for connecting the thermal sensor module to your iPhone)
- Computer with software for reading and analyzing thermal images (such as FLIR Tools or Seek Thermal App)
Make sure you have all the necessary materials before you begin. This will ensure a smooth and successful DIY project. Take the time to double-check the compatibility of the thermal sensor module with your iPhone model to avoid any compatibility issues.
Modify your iPhone
If you want to make a heat sensing camera for your iPhone, you will need to modify your device to accommodate the necessary hardware. Here are the steps to follow:

Step 1: Gather the necessary tools and materials for the modification. You will need a heat sensor module, a compatible cable for connecting the module to your iPhone, and a protective case to hold the module securely in place.
Step 2: Open your iPhone using the appropriate tools. Be extremely careful during this step to avoid damaging any internal components.
Step 3: Locate a suitable spot within your iPhone’s internal structure to install the heat sensor. Make sure it is close to the camera lens to ensure accurate temperature readings.
Step 4: Connect the heat sensor module to your iPhone using the compatible cable. Ensure that the connections are secure.
Step 5: Carefully reassemble your iPhone, making sure all components are properly aligned. Double-check that the heat sensor module is securely attached and protected by the case.

Step 6: Install any required software or apps on your iPhone to enable the heat sensing functionality. Follow the instructions provided with the heat sensor module to ensure proper setup.
Step 7: Test your heat sensing camera by pointing it at different objects and observing the temperature readings on your iPhone’s screen. Make any necessary adjustments or calibrations to ensure accurate results.
With these modifications, you can now use your iPhone as a heat sensing camera. Have fun exploring the world of heat signatures and thermal imaging!
Calibrate the heat sensing camera
Before using the heat sensing camera on your iPhone, it is important to calibrate it for accurate temperature readings.
Step 1: Find a stable temperature reference
Locate an area or object with a stable temperature that you can use as a reference point. This can be a room with a known temperature or an object with a consistent heat emission.
Step 2: Open the heat sensing camera app
Launch the heat sensing camera app on your iPhone.
Step 3: Access the calibration settings
Within the heat sensing camera app, locate the calibration settings. This can usually be found in the app’s menu or settings section.
Step 4: Enter the reference temperature
Enter the temperature of the stable reference point you identified in Step 1. Make sure to enter the temperature in the appropriate unit (Celsius or Fahrenheit).
Step 5: Start the calibration process
Follow the instructions provided within the calibration settings to start the calibration process. This may involve capturing a thermal image of the reference point or holding the iPhone in a specific position.
Step 6: Wait for calibration completion
Allow the calibration process to complete. This may take a few seconds or minutes, depending on the app and its algorithms.
Step 7: Verify calibration accuracy
Once the calibration process is finished, verify the accuracy of the heat sensing camera by comparing its readings to the known temperature of the reference point. If there is a significant discrepancy, repeat the calibration process.
Note: Calibration may need to be performed periodically, depending on the app and its recommendations.
By properly calibrating the heat sensing camera on your iPhone, you can ensure more accurate temperature readings and improve the reliability of your thermal imaging applications.
FAQ
Can I transform my iPhone into a heat sensing camera?
Yes, you can transform your iPhone into a heat sensing camera by using an external thermal imaging device that can be attached to your phone.
What is a heat sensing camera used for?
A heat sensing camera, also known as a thermal imaging camera, is used to capture and display the temperature distribution of objects and scenes. It can be used in various applications such as electrical inspections, building diagnostics, and wildlife monitoring.
How does a heat sensing camera work?
A heat sensing camera works by detecting infrared radiation emitted by objects. It uses a special sensor that is sensitive to infrared light and converts it into a visible image. The different temperature levels are represented by different colors in the image, allowing you to see the heat patterns.
Are there any apps available for turning my iPhone into a heat sensing camera?
Yes, there are several apps available in the App Store that utilize the thermal imaging capabilities of external devices to turn your iPhone into a heat sensing camera. Some of these apps also offer additional features such as temperature measurements and image analysis.